Total cook time = 7-8 hours
For those of us addicted to working our way through the BBQ line-up, brisket remains as one of the most challenging categories, or maybe it’s just me. Over the last decade of my (serious) BBQ life, I have developed decent recipes for chicken, pulled pork, ribs, and prime rib but brisket stood as the last great challenge to be conquered. I tried dozens of recipes with smokers, gas grills, a pellet grill, and charcoal but my briskets were mostly disasters with a rare, unrepeatable victory. There is nothing worse than starting the fire at 4am and after a 14-16 hour cook having the anxious family dig into a dry, tasteless, tough, or overly seasoned 15-pound hunk of black meat. After many years of admittedly self-inflicted torture, I am happy to report that I have narrowed the number of uncontrolled variables to a point where I can now produce a great brisket every time.
Here’s the ticket to a low-and-slow cooked juicy, tasty, tender brisket that only takes 7 hours with a 5-hour cook.
- High brisket quality, prime is best;
- Cooking method that retains moisture;
- Using a “Texas Crutch” by wrapping with foil and adding moisture;
- Using a basic rub that accents the natural beef flavor;
- Letting the meat rest after the cook.
The Meat
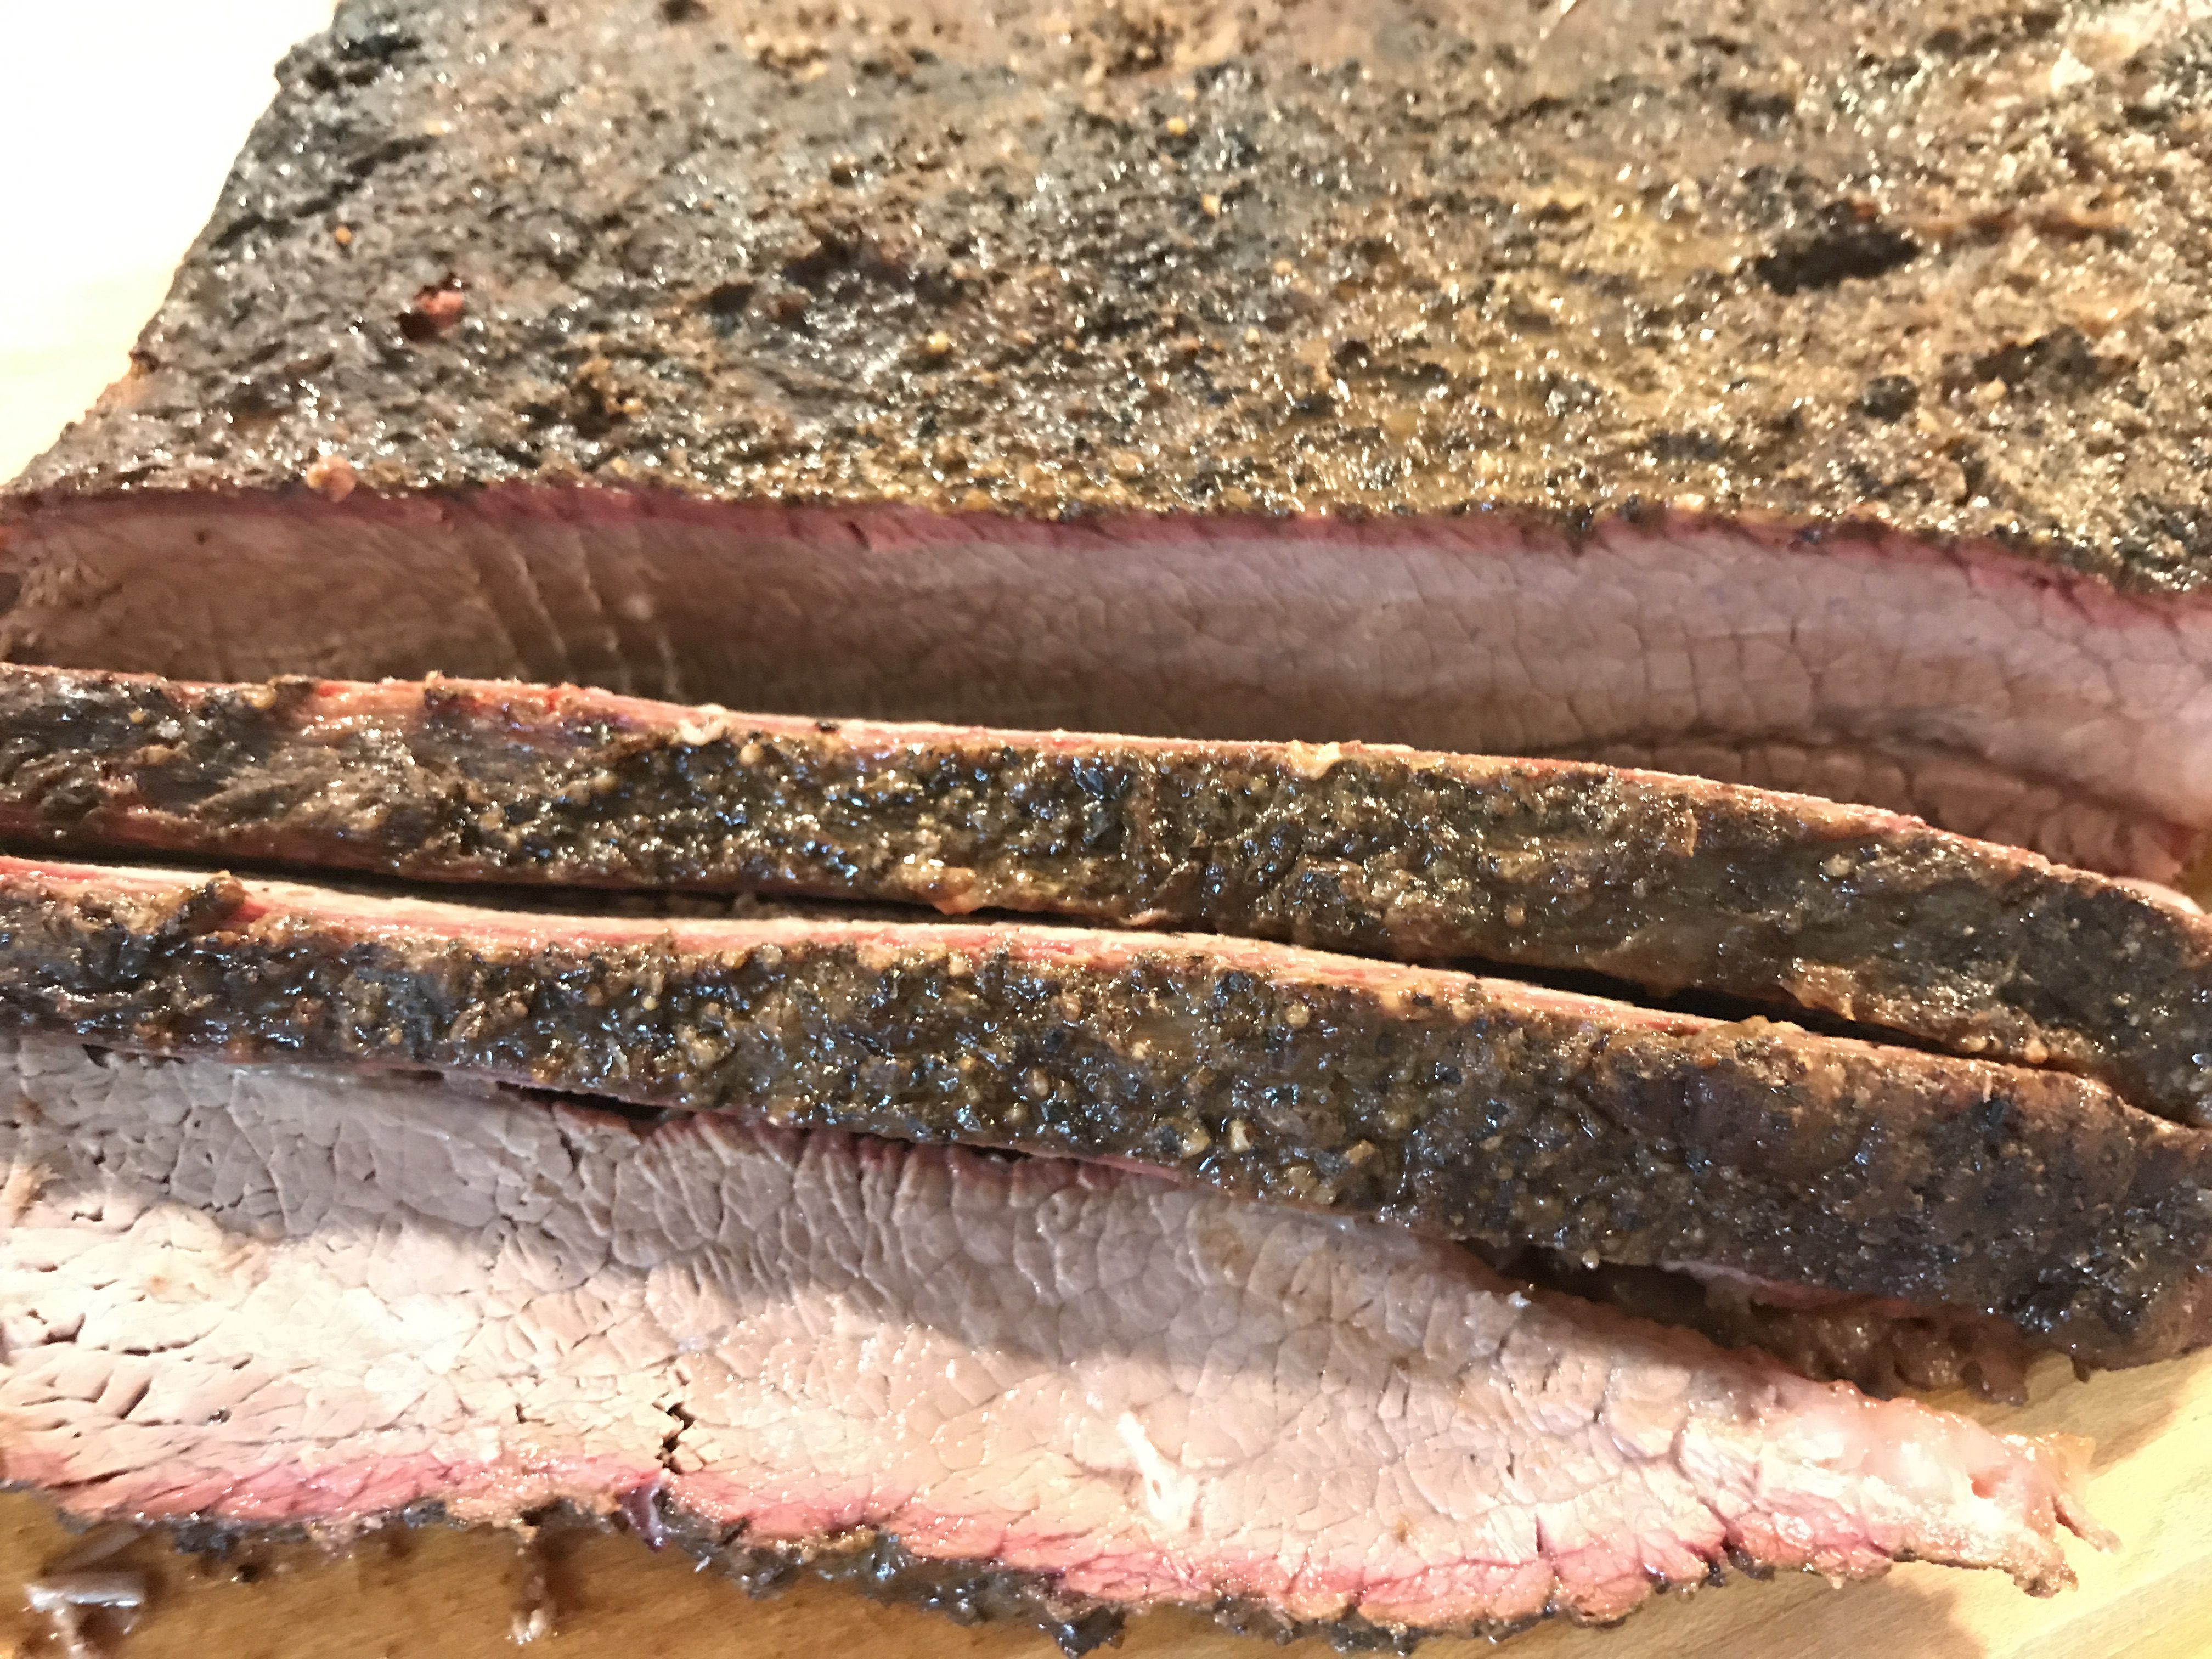
As with most BBQ recipes the most important ingredient is the meat and with brisket, it is worth going to the next level. With this cut, in particular, it makes a HUGE difference and is probably the #1 reason for most of my failures. I usually buy my briskets at Costco and go for prime cuts. Choice works but anything less and you have a high chance of a tough cut. In my experience it is better to use a whole packer brisket, 8-16 lbs; the smaller cuts just don’t retain moisture sufficient for a good BBQ. The whole brisket includes both the flat and point cuts.

Preparation and Dry Brining
Briskets typically include thick layers of fat that need to be removed. With a sharp knife trim the off excess fat until only 1/4″ remains in some areas. The fat does not improve the flavor and wastes the rub, so trim it back to a minimum. After trimming I dry brine the meat by adding 1/2 tsp per pound (about 2 Tbsp for a typical full 12-14 lbs brisket) evenly over both sides of the meat and let it sit in the frig for 2-4 hours prior to cooking. If you’re using a Pit Barrel Cooker. it’s also good to check the length of your brisket. If it hangs too low trim off the lower portion and cook separately or hang the meat from a hook placed lower on the meat.
Cooker
Choose a cooker that retains moisture which results in a tender, juicy brisket. I use a Pit Barrel Cooker which is super easy and works every time. However, in theory, any method that retains moist heat like a ceramic cooker, pellet grill, or charcoal/wood grill with a water pan will work. Retaining moisture is key otherwise the long cooking times will dry out the meat. The cooker should also maintain a low and slow heat, typically about 225-250F (higher in the Pit Barrel). In general, higher temps will produce a tough brisket. As they say, tasty is easy; tender and moist is difficult. [Note: there are hot and fast methods that work well]. Adding wood is important for that smokey flavor, so your cooker should support adding wood chunks, chips, or pellets. My favorites are oak, mesquite, and hickory but whatever smoke flavor you add is a personal choice (see Zen of Wood).


A Pit Barrel Cooker is super easy and I don’t watch the temperature or the coals. Follow the basic instructions: I fill the basket with Kingsford Briquets, light the coals (using a chimney, paper, or whatever), then wait 20 min until the center area is well-lit. Make sure the vent is open as instructed for your altitude, pop in the two rods, and you’re ready for an easy cook. [Note: other brands and sizes of charcoal will work but you’ll have to work out your own time and temperature combination. The basic method works every time for me and I never lose heat, even on long cooks.]
Pastes and Rubs
What you put on the meat is important but there are a wide variety of choices. Just basic salt and pepper in equal proportions works with a good cut of meat. I use the mix below, which includes a paste that adds flavor that enhances the juice and meat, and a basic rub, which accents the overall beef flavor profile. You can add whatever you like to change the basic flavors:
- Cayenne and/or white pepper for spicier meat;
- Different types of chile such as paprika or mild/hotter varieties;
- Add additional flavors with sage, ground ginger, rosemary, thyme, brown sugar, honey, or cinnamon to create a unique flavor.
You’ll notice I don’t use salt in my rub but instead use dry brining prior to cooking (see above). It does not only minimize the salt but helps the meat retain moisture while cooking.

Flavor Paste:
- 3 Tbsp crushed Beef Bouillon cubes (or Better than Bouillon)
- 3 Tbsp prepared Yellow Mustard
- 1 Tbsp Worcestershire sauce
Rub:
- 3 Tbsp coarse ground black pepper
- 1 Tbsp white or brown sugar
- 1 Tbsp onion powder
- 2 Tsp garlic powder
- 2 Tsp chile powder (Ancho preferred)
- 1 Tsp Chipotle chile powder
After the trim and dry brine, evenly coat the meat with the flavor paste then sprinkle the rub on both sides and rub it into the meat. You can do this right before the cook: there is no need to let it sit. For the Pit Barrel I typically use 2-3 hooks to hang the meat because there is nothing worse than losing a $50-100 brisket into the coals!
Cooking and the “Crutch”
When the coals are ready just hang the meat in the smoker, relax and enjoy the smoky aromas emanating from the cooker. I usually throw in some wood chunks at the start and every 30-60 min as needed for the first few hours, but don’t overdo it. You may want to insert a remote thermometer but check the temp every few hours. When the temperature of the meat reaches 160-170F, pull it off and wrap it tightly in foil or butcher paper and add some liquid to braise the meat.

With the flavor paste I just add 1/2 cup of water but you can use whatever you want such as your favorite beer, beef broth, honey and/or red wine. Then wrap it up and put it back in the cooker [you’ll need to insert the grill in the Pit Barrel Cooker but be sure to put the rods back in as they help maintain the right temp]. An oven is fine too! When the temp reaches 200-205F, pull the meat and let it rest.
Resting
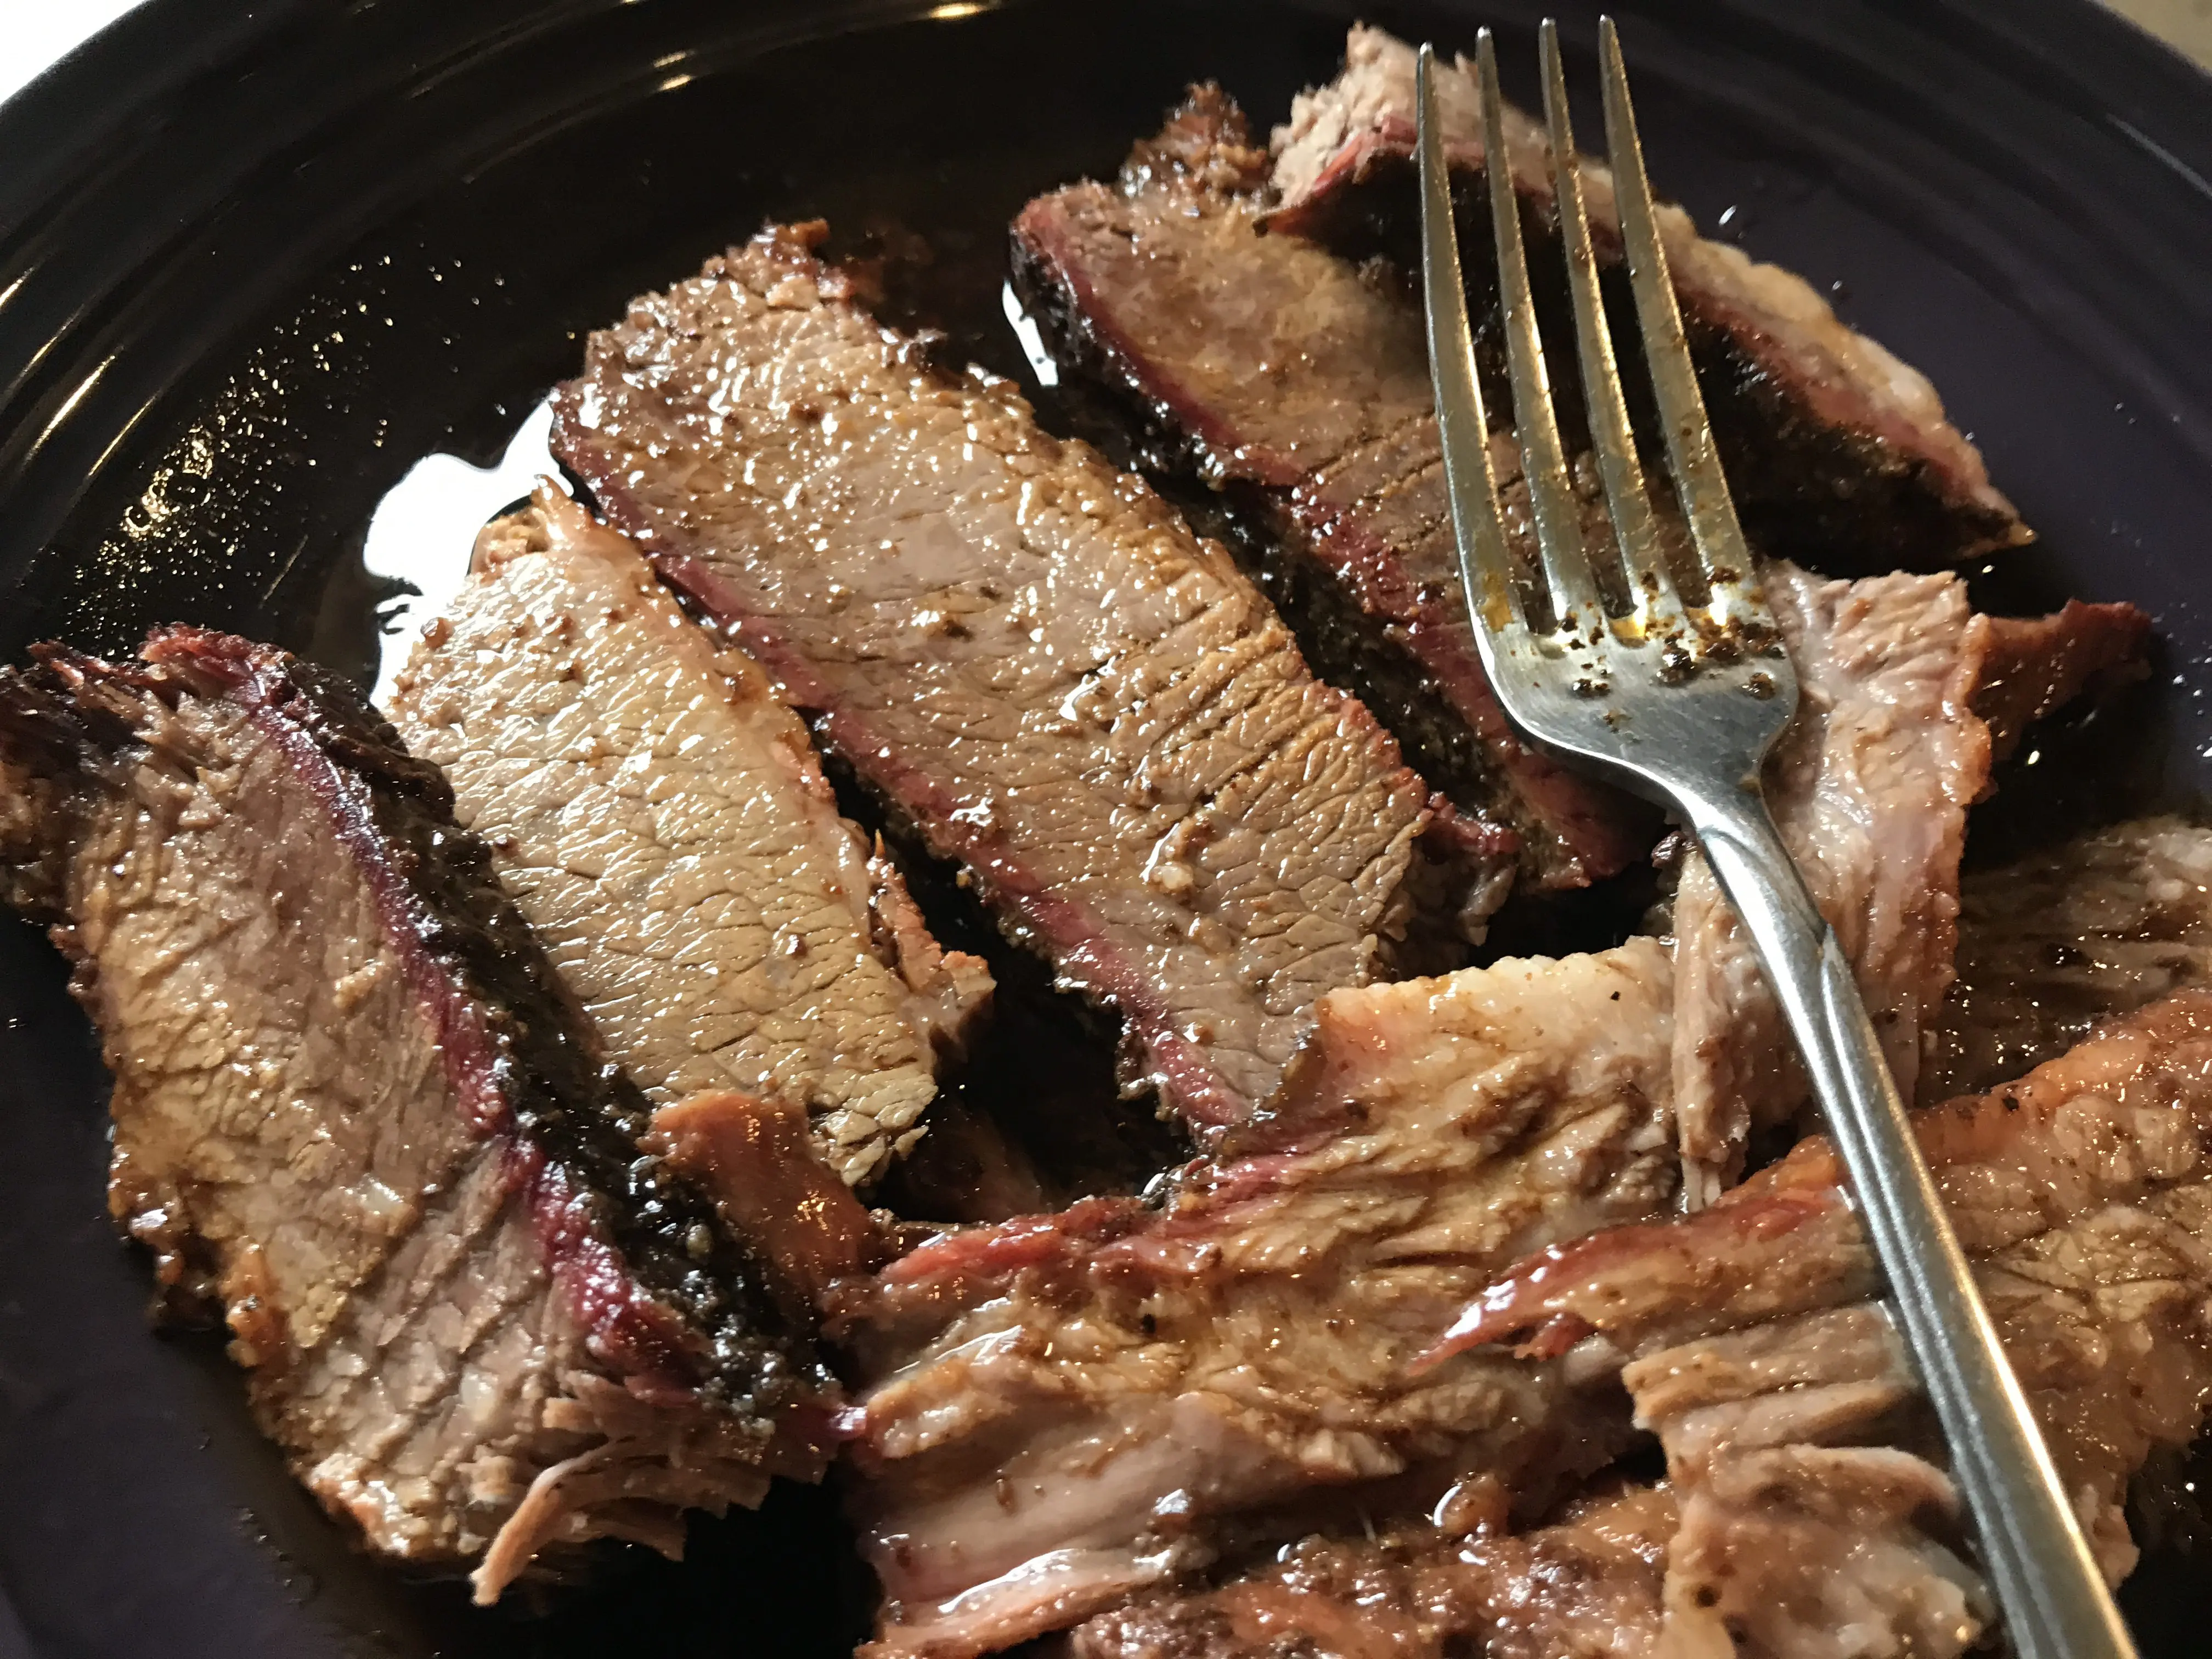
Resting is a key part of the cooking process as it allows the meat to continue steaming and creates a more tender and juicy meat. You should allow at least an hour, I usually use two. Resting should be done in an insulated box of some kind to retain heat. I just wrap it in old towels and stick it in a cooler but old blankets work or ideally an insulated food carrier like a Cambro. After it’s rested pull it out and enjoy the rewards of your hard work: a juicy, tender, melt-in-your-mouth brisket! Save the juice from the wrap and pour it over the meat or serve separately. For an extra treat create Burnt Ends (see here for how to do that along with carving tips.)


